Plesk speed out of the box. As a matter of fact, Plesk Onyx already offers some options to improve performance. This brief HowTo lists tipps for the initial configuration and some minor adjustments.
Architecture
Plesk offers four distinct web server architectures for Plesk speed:
- Apache only web server:
In this mode Apache is the only web server. This is ok for low traffic sites, where we are not really caring for performance at all. For WordPress functionality it is optimal. For performance it is the second slowest Plesk speed architecture. - Nginx only web server:
Here nginx is the only web server. Plesk speed overall is good to great, while content suffers in performance and WordPress functionality. WordPress integration is poor to non-existant. - Apache backend, nginx frontend proxy (edge server):
Actually the worst architecture and meant for debugging for the main part. Apache serves all files on every request, while nginx is just the edge server to deliver the data. Here nginx features are almost not used at all. - Apache backend, nginx frontend reverse proxy (edge server):
A near optimal WordPress performance with Apache, while adding some nginx features. As a reult this increases performance and helps when site traffic increases. Additionally nginx can serve static content, while Apache handles the dynamic content. This architecture can be further optimized to a lightning fast web server and cache site. So it will be able to handle even huge traffic spikes at the fastest speed possible. This architecture can be further improved by optimzing content on the fly. The swiss army knife architecture.
In fact you want to configure 4. as your default. Simply install nginx:
Tools&Settings => Updates & Upgrades => Add And Remove Product Components => Nginx web server and reverse proxy server
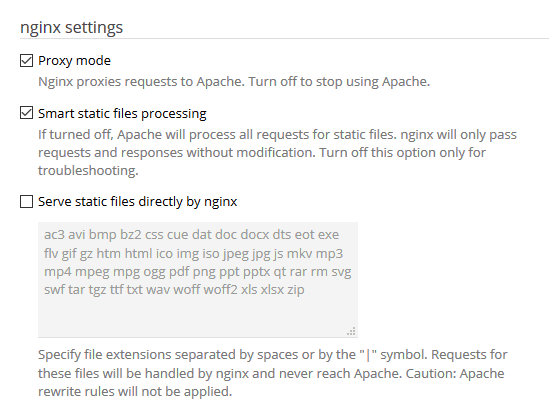
Configure your site afterwards as follows (Apache & nginx settings):
Since we are using mod_pagespeed and due to many other reasons, we do not allow nginx to answer any request for file directly. Reasonable exceptions to this rule would be sound & video files and – depending on the theme – maybe font files.
Installation
The basic installation itself is simple:
- Activate pagespeed insights (Extensions => Google PageSpeed Insights) and install Apache mod_pagespeed (Extensions => Google PageSpeed Insights => Goto Extension
- Set php version to newest php-version (in my case 7.2). Ensure Zend opcache is properly configured.
- Add HSTS either for all subdomains or the domain only.
Create both variants in a file /etc/nginx/conf.d/aa100_prep_hsts.conf
map $scheme $hsts_header {
https ‘max-age=15768000’;
} map $scheme $hsts_isd_header {
https ‘max-age=15768000; includeSubDomains; preload’;
}
To nginx add the directive:
add_header Strict-Transport-Security $hsts_isd_header always;
Alternatively use:
add_header Strict-Transport-Security $hsts_header always;
add_header X-Frame-Options “DENY”;
Additional – Configure pagespeed:
- vi /etc/httpd/conf.d/pagespeed.conf
Check rname by
du -s -h –apparent-size /var/cache/mod_pagespeed/rname
KB*1.75 in KB = “ideal cache size”
ModPagespeedCreateSharedMemoryMetadataCache “/var/cache/mod_pagespeed/” 256000
Optional:


Leave A Comment